Interactive Crawler
This guide explains how to use the Interactive Crawler to manually and automatically explore a website through a real browser session.
Why and when to use Interactive Crawler
Best for: JavaScript-heavy applications, authenticated areas, and complex user workflows
Unlike traditional crawlers, Interactive Crawler launches a browser and loads the target website. A crawler control dialog is displayed, allowing the user to start, pause, resume, and stop crawling while interacting with the page.
This approach is ideal for modern web applications that require user interaction before content, endpoints, and functionality become visible.
Use when:
- Crawling Single Page Applications (SPAs)
- Exploring authenticated content
- Navigating complex workflows
- Discovering hidden API endpoints
- Crawling JavaScript-generated content
- Investigating multi-step forms and wizards
How Interactive Crawling Works
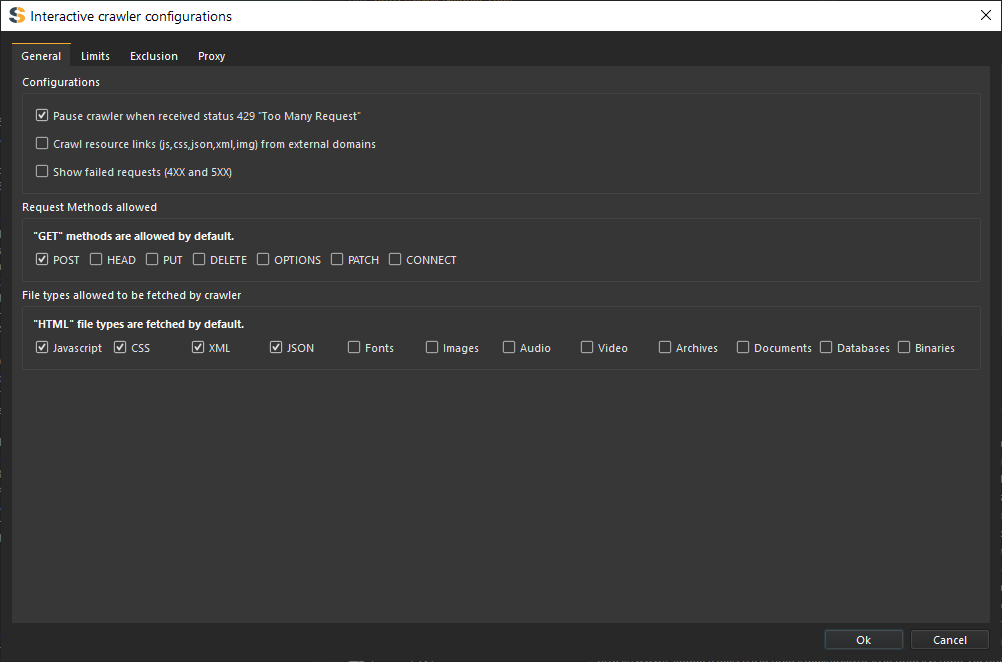
After launching the browser and navigating to the target URL, a crawler control dialog appears. The dialog remains available throughout the session and provides controls for managing the crawl process.
The crawler can operate in either Manual Mode or Automated Mode.
Crawl Modes
Manual Mode
In Manual Mode, the user controls browser navigation while SpiderSuite observes activity and extracts information from visited pages.
The crawler automatically records:
- Visited URLs
- Forms
- API requests
- API responses
- JavaScript resources
- Files and downloads
- Links discovered on the page
Typical workflow:
- Open login page
- Authenticate manually
- Navigate through the application
- Open menus and dialogs
- Submit forms
- Explore application functionality
SpiderSuite continuously analyzes content as you browse.
Automated Mode
In Automated Mode, SpiderSuite automatically interacts with the currently loaded page.
The crawler identifies and interacts with:
- Links
- Buttons
- Navigation menus
- Tabs
- Accordions
- Forms
- Pagination controls
- JavaScript-generated elements
The crawler attempts to maximize application coverage while avoiding repeated interactions with previously explored elements.
Interactive Crawler Dialog
Start Crawl
Begins crawling of the currently loaded page.
Once started, SpiderSuite begins collecting:
- URLs
- Forms
- Endpoints
- Resources
Pause Crawl
Temporarily suspends crawling while keeping the browser session active.
Resume Crawl
Continues crawling from the current page state.
Stop Crawl
Immediately stops all crawling activity.
The browser session remains available for manual investigation.
Clear Session
Removes recorded interaction history and resets crawl state.
Switch Mode
Allows switching between:
- Manual Mode
- Automated Mode
without restarting the browser session.
Configurations
Maximum Crawl Depth
Controls how deeply the crawler follows newly discovered links.
- Depth 0: Current page only
- Depth 1: Follow links from current page
- Depth 2+: Continue recursively
Maximum Actions
Limits the number of automated interactions performed during Automated Mode.
Examples:
- Clicks
- Form submissions
- Menu expansions
- Tab selections
Delay Between Actions
Defines the delay between automated interactions.
Increasing the delay may improve stability on heavily scripted applications.
Follow Navigation Events
Automatically crawl pages reached through:
- Link clicks
- JavaScript navigation
- History API changes
- Redirects
Follow New Tabs
Automatically monitor and crawl tabs opened by the application.
Include JavaScript Resources
Collect JavaScript files loaded during the session.
Include Forms
Extract forms and form fields discovered during crawling.
Automated Interaction Strategy
Analyze Page
The crawler scans the DOM and identifies interactive elements.
Prioritize Elements
Links, buttons, forms, and navigation controls are prioritized.
Perform Interaction
The crawler clicks or interacts with the selected element.
Wait for Changes
SpiderSuite monitors DOM mutations, network activity, and navigation events.
Analyze New Content
Newly loaded content is processed and added to the sitemap.
Record State
The interaction is stored to prevent repeated actions.
Continue Exploration
The process repeats until the crawl completes or reaches configured limits.
Crawling
Select Interactive Crawler
Choose 'Interactive Crawler' from the crawler selection menu.
Enter Target URL
Specify the website or application to crawl.
Examples:
Launch Browser
SpiderSuite opens the selected browser and navigates to the target.
Choose Crawl Mode
Select either:
- Manual Mode
- Automated Mode
Start Crawling
Use the crawler dialog to begin analysis of the loaded page.
Navigate or Interact
Either manually browse the application or allow SpiderSuite to automate interactions.
Review Results
Monitor discovered pages, endpoints, forms, technologies, files, requests, and responses from the results views.
Interactive Crawler is particularly effective against modern JavaScript applications because it analyzes content after execution, captures live network traffic, and discovers functionality that may not be reachable through traditional crawling techniques.